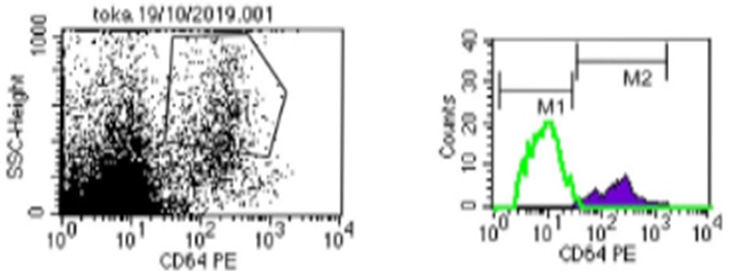
Figure 2:
Flow cytometry for control.